
So, sleeves! First let’s recap what our illustrious and industrious panel is doing here, since there are few people switching teams during the sleeve portion of the #fringeandfriendsknitalong, and I think this is interesting:
Team Seamed Sleeves: Kate, Anna, Rebekka, Amy, Meg, me
Team Seamless Sleeves: Jaime
As Jaime said, “What the heck?” I really thought more people would opt to do the sleeves seamlessly. For me the only argument against is that, with all the cabling, I feel like it’ll be faster to knit them flat and seam than it would be to do them in the round. So I might as well have the benefit of that seam.
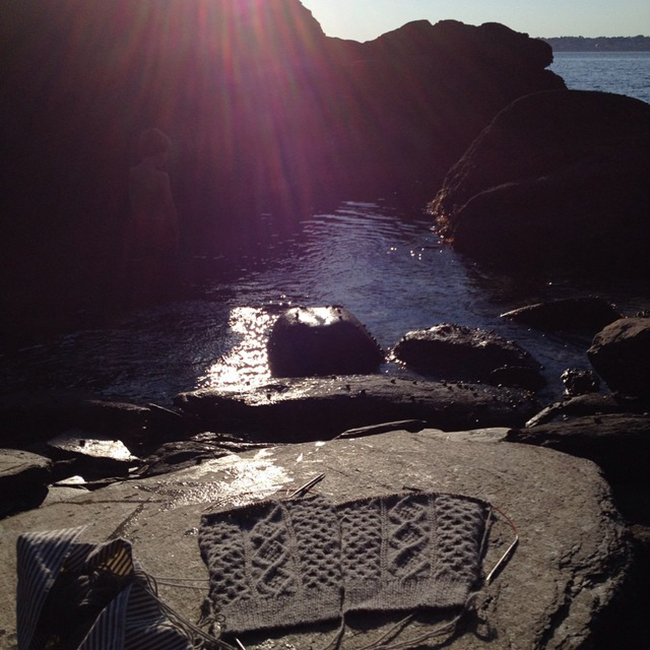
I also want to point out in Amy’s sweet photo of her sunbathing sleeves up there (love that project bag!) that although it looks like she’s knitting both sleeves on one long needle, she’s technically not. But she is knitting them simultaneously. If you have Second Sleeve Syndrome, it’s something to think about. You can do like Amy, or even just cast on both sleeves on the same long needle — you’ll be working two pieces of fabric from two balls — and work those sleeves side-by side. That way you finish them both at once and can be utterly certain that you increased on all the same rows and so on. I’ve never done it before but am definitely planning to do it here.
Apart from that, there are three things I want to discuss about sleeves today:
1) PATTERN PLACEMENT
There were a couple of people asking in comments way back about whether the sleeves needed to end on the same chart row as the fronts and back. I mistakenly answered that it didn’t matter, I guess thinking for a brief moment that this was a set-in sleeve sweater or something. Because this yoke is joined in one piece at the underarms and worked seamlessly upward from there, you will want to be on the same row of the chart when you join all the pieces. That way your honeycomb will line up and you won’t have to keep track of being on different rows in different charts.
There have also been questions from people about how to know where to stop with the sleeves if you’ve done them first, since the pattern instructs you to end at the same chart row as the back. Regardless of whether you start with the body or sleeves, my best advice is think of it as tentative. Put your stitches on waste yarn and know that you might need to adjust one or the other upward or downward. For me, the sleeve length is more critical than the body length — I want that sleeve to hit me exactly at the top of my hand, whereas I have less precise wishes for the body length. It just needs to be in the right neighborhood. So even though I’ve started with the body, I’ll knit my sleeves to where I want them and then adjust my body pieces to match that spot. You may do whichever makes the most sense to you.
2) SLEEVE LENGTH
This is a soapbox of mine. I’ve touched on it in the row gauge post and elsewhere, but want to say again that where your final sleeve cuff hits you is a function of sleeve length (meaning, how far you knit before the underarm shaping) plus armhole depth. The sleeve length given in the pattern may or may not be right for you. With your arm hanging straight down, have someone measure from the top of your shoulder to your wrist. Then take a look at the armhole depth in the pattern schematic. Let’s say your desired shoulder-to-wrist length is 23″. And let’s say the pattern’s armhole depth is meant to be 7.25″ of that. That means your sleeve needs to be 15.75″ from cast-on to underarm. BUT, that’s also assuming your row gauge matches the pattern gauge, which is the only way your yoke dimension will match the schematic dimension. If your row gauge is 10% bigger, your yoke will be 10% longer, making your armhole depth 8″. If you attach that same 15.75″ sleeve to it, you now have a total sleeve length of 23.75″, almost an inch longer than you wanted it. And if you had knitted the 17.25″ sleeve the pattern calls for, your sleeve would now be hanging halfway down your hand. So if you’re picky about sleeves, pay close attention to all of your measurements. And maybe re-read that row gauge post.
3) INCREASING IN PATTERN
Many have asked about this, and here again I’m going to hand the microphone to Kate Gagnon Osborn. Take it away, Kate—
. . . . .
For ease of space (as more space = more cost), it is industry standard to not chart out a full sleeve and, instead, instruct the knitter to “… work sts in patt as number of sts permits …,” but how do you “increase in pattern” exactly?
As you’re increasing, you will actually be working stitches in stockinette until you have enough stitches to work a full repeat of the stitch pattern. In the case of the Amanda sleeves, this means one cable cross, or a total of 4 stitches. Below, I’ve charted the sleeve with 4 increases to show how this would look in your knitting.
NOTE: The edge stitch is not charted — always work the edge stitches (aka selvedge stitches) as written in the pattern. Also, only the right side of the sleeve is included below; the same rules apply to the left half of the sleeve. As this particular pattern has you begin to increase after a certain length on your sleeve (not at a certain row), you may find that you are working your increases on a different row of the chart than pictured. The process is the same, regardless of where your increases may fall.

Increase #1: After working one increase, you have [a multiple of 4 stitches] + 1 in the honeycomb portion of your sleeve. You will work all of your honeycomb stitches as charted, and this newly increased stitch in stockinette stitch (knit on the right side, purl on the wrong side).

Increase #2: After working two increases, you have [a multiple of 4 stitches] + 2 in the honeycomb portion of your sleeve. You will work all of your honeycomb stitches as charted, and your two extra stitches in stockinette stitch.

Increase #3: After working three increases, you have [a multiple of 4 stitches] + 3 in the honeycomb portion of your sleeve. You will work all of your honeycomb stitches as charted, and your three extra stitches in stockinette stitch.

Increase #4: This is where it gets fun! After working four total increases, you are back to a pure multiple of 4 in the honeycomb portion of your sleeve. You will continue to work all of your honeycomb stitches as charted, and the 4 increased stitches in stockinette, until you reach the next row with a cable cross. Then, you will work these 4 stitches in the cable cross, maintaining the alternating left/right leaning cable pattern when doing so. If, as in my sample chart, a cable cross occurs on the same row as your 4th increase, wait until the next cross to work it into your honeycomb pattern — so you’re not trying to increase and cable on the same stitch.
Simply continue in this way until you have worked all of your increases!
—KGO
. . . . .
Thanks again, Kate!
.
PREVIOUSLY in #fringeandfriendsknitalong: WIP of the Week, week 2 (and other fun stuff)
.
Photo © Amy Christoffers, charts © Kate Gagnon Osborn; used with permission

I’m working a top-down/raglan sleeves sweater and decided to use the Jersey Shore style (waffle stitch). It’s pretty good when you get the most of a sweater done FIRST. That guarantees you will finish your sweater – it gets the most done as that’s where you deal with the MOST stitches.
Putting the sleeve stitches on separate colored yarn or stitch holders, works fine, but I’ve discovered that knitting down the body from there about 4”, is enough to put on stitch holders or another colored yarn and save it for last.
Then go back up to those sleeves, put them on LONG, LONG needles and do that Magic Loop method and knit both sleeves at once (2 separate skeins/balls of yarn, of course).
Measuring the arm length can be tricky, but here’s the ‘catch solution’ and it’s taken me years to figure out. Do the measuring of the person who the sweater is for – MEASURE ARMPIT TO WRIST WITH ARM TOTALLY OUTSTRETCHED. That is how you get the TRUE length that you need. You can put a cuff on it for wearer’s desires, or you can put a roll-up ‘cuff’ for a different look and for the person who always ‘tugs down’ on the cuffs.
I have started using the Magic Loop methods for almost everything. Seams, for me, are awful and look terrible. The Magic Loop methods eliminates all seams. I always use super LONG needles, and I now knit – a PAIR OF SOCKS at the same time, and a PAIR OF MITTENS at the same time. Simple – do the work ONCE equals a MATCHED pair.
Happy knitting!
Shari Jones
mejs224@yahoo.com
This is brilliant! And what a great tip for any kind of cable knitting, really. I’m always struggling to maintain a cable pattern over increases/decreases, so this will give me a new way to approach it. :)
All it takes is counting and watching what you DID!
what a great photo!
A big Like for the photo! :)
Man, I am nowhere near the sleeve stage yet!
http://craftycrusader.tumblr.com/post/99573397335/this-is-one-of-my-current-wips-a-beautiful
Had hoped to be working on sleeves this week but not there yet. This is a fantastic post that I will be referring to when I do finally get to the sleeves. Thanks to Karen and her fabulous crew! My progess so far. http://instagram.com/p/t8tji1vDPd/
Pingback: WIP of the Week, week 3 (plus new buttons!) | Fringe Association
Pingback: The simple joy of seaming | Fringe Association